 myAcademy® Rewards Credit Card
Camping With a Dutch Oven in 6 Easy Steps
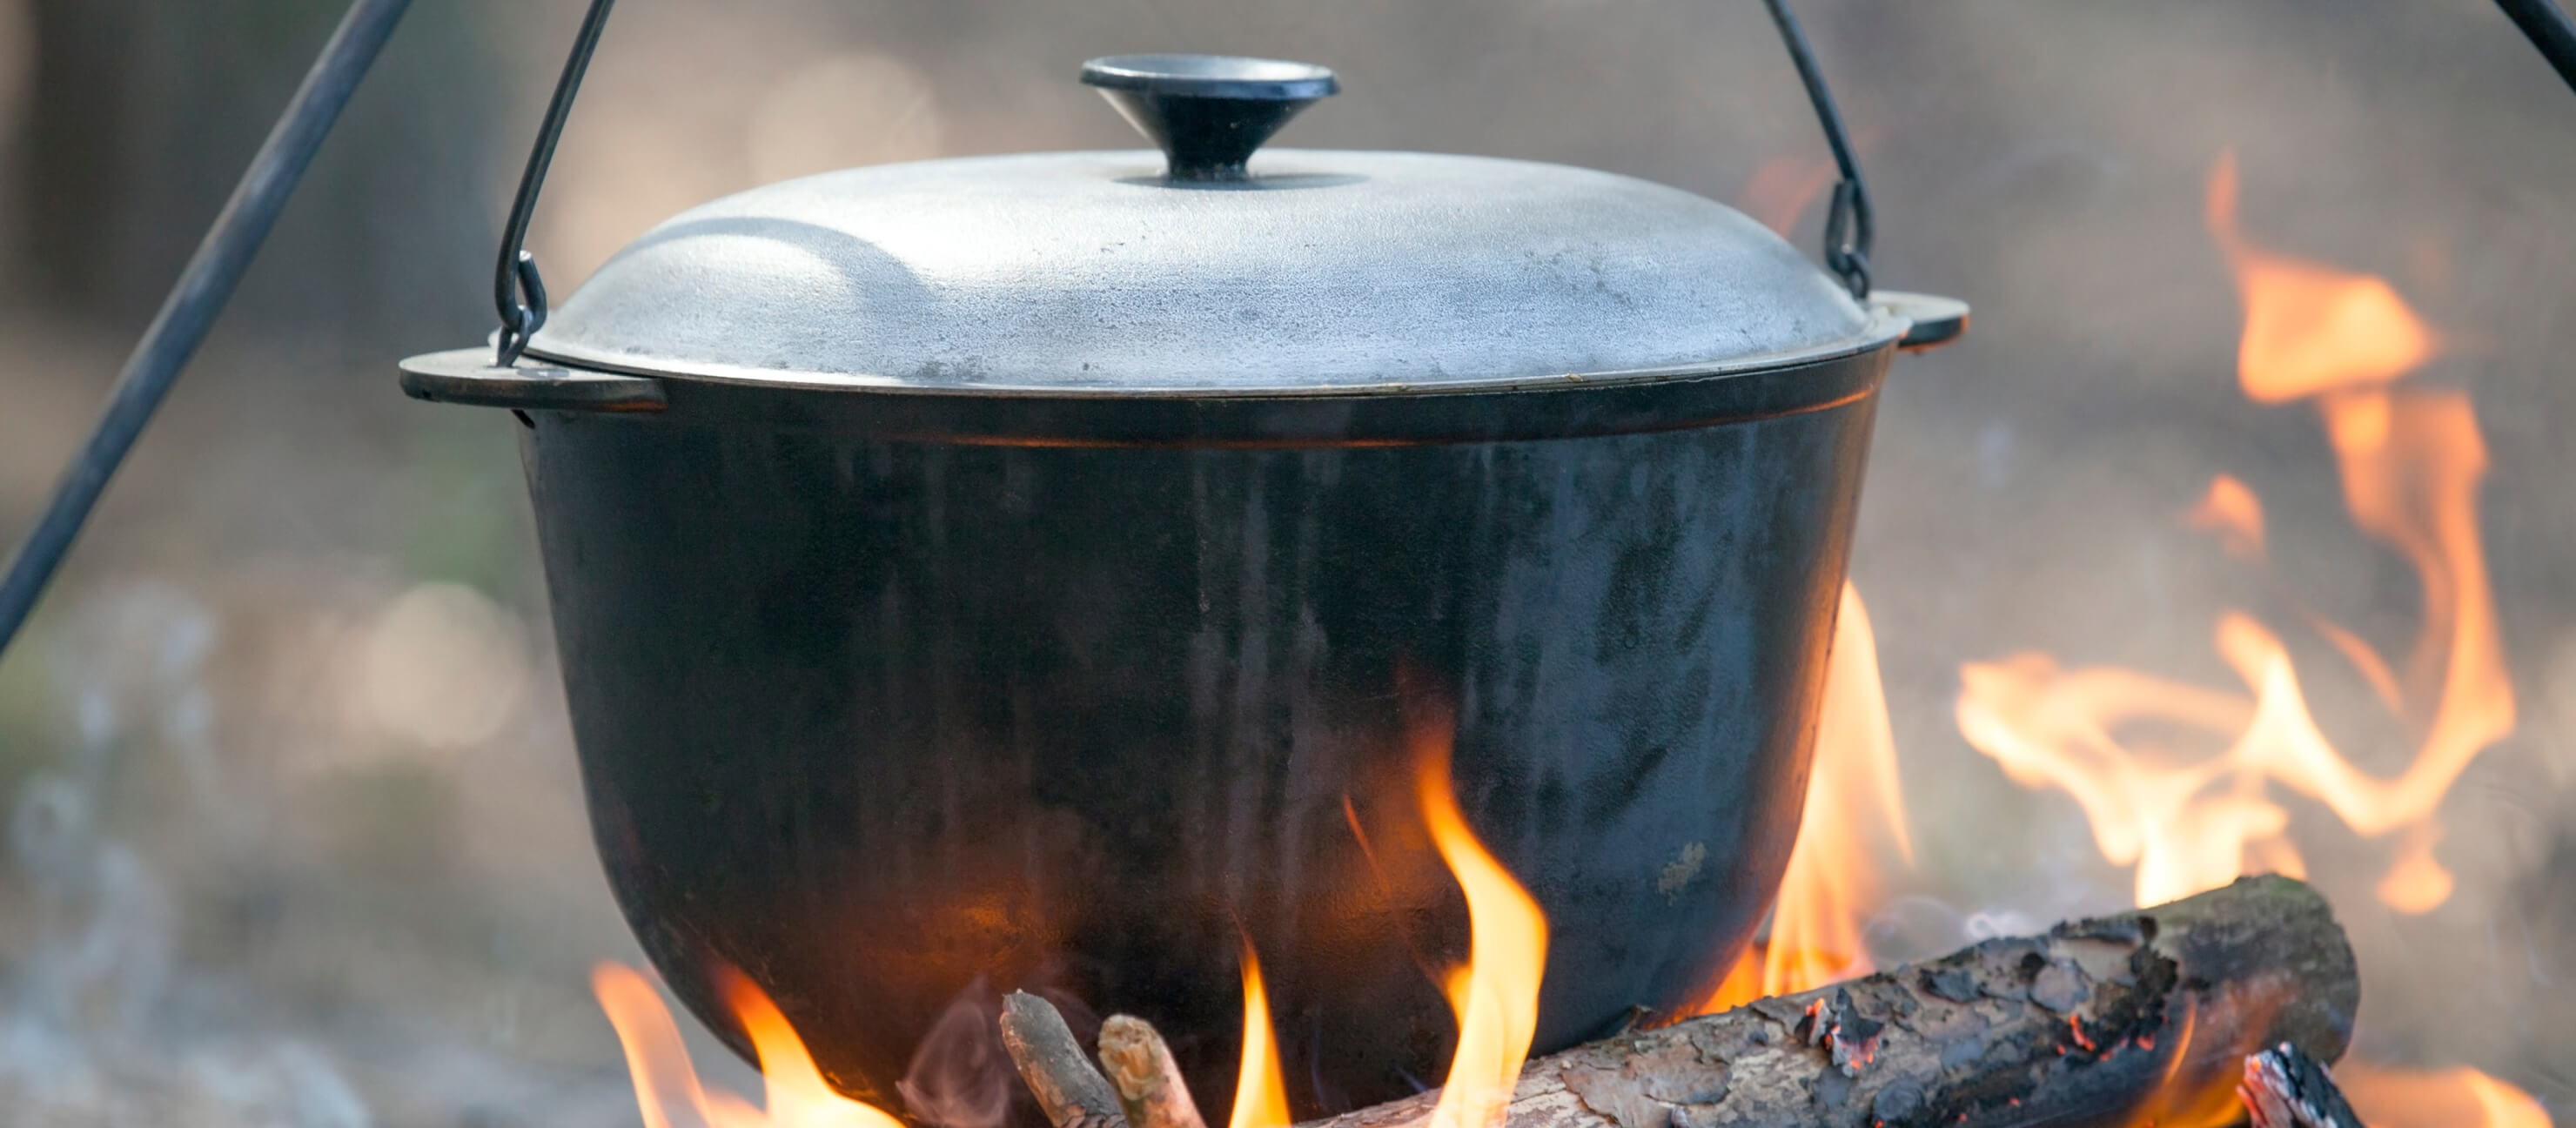
Enhance your camping meals by bringing along a camping Dutch oven on your next outing. Cook everything from breakfast and dinner to dessert with this versatile camping essential. A camping Dutch oven is different from the one you’d use at home due to its durable cast iron construction, support legs, and flat flanged lid.
Key Takeaways
- Learn how to use a Dutch oven for camping (step by step): Step 1: Choose a cooking method, Step 2: know what temperature you'll need, Step 3: light your campfire, Step 4: prep the ingredients, Step 5: cook the food, & Step 6: enjoy your meal!
- Peek at our Dutch oven temperature chart for your next camping trip: You'll need to know the right temperature before you get to enjoy the tasty fruits of your hard work!
- Understand how to manage heat: Learn all about the easy way to estimate how many charcoal briquettes you'll need. You'll need the right ratio to achieve the perfect cooking temperature.
- Catch these Dutch oven tips for beginners: Never miss a tasty meal again at the campsite! You'll learn the most important tips for when you camp with a cast iron Dutch oven.
- What NOT to cook in a Dutch oven while camping: Some meals just don't cook well in a Dutch oven — especially while camping! These can actually harm the cast iron seasoning or even damage the whole oven.
Step 1: Choose a Cooking Method
The cooking method you choose will depend on a few factors. These include what you want to cook, what type of fuel you have, and what type of heating method you will use.
| Camping Dutch Oven Cooking Reference Guide | ||||
|---|---|---|---|---|
| Method Name | Overview | Fuel Type | Heating Method | Best Used For |
| Sear | Add flavor by using high heat to brown and crisp your meat | Charcoal briquettes | Single-direction heating | Searing steaks, chicken, etc. |
| Steam | Place your Dutch oven over boiling water to cook foods with moist air | Charcoal briquettes | Single-direction heating | Steaming rice, vegetables, etc. |
| Simmer & Boil | Heat a liquid over moderate/high heat to soften foods and add flavors | Charcoal briquettes | Single-direction heating | Stews, soups, & chilis |
| Saute & Pan Fry | Use oil or fat over high heat to brown and cook foods | Charcoal briquettes | Single-direction heating | Stir-fry, fish, onions, etc. |
| Braise | Brown food over high temperature first, then simmer in a covered pot with liquid | Charcoal briquettes or wood embers | Dual-direction heating | Chicken thighs, short ribs, etc. |
| Baking | Cover your Dutch oven over dry heat to prepare food | Charcoal briquettes or wood embers | Dual-direction heating | Bread, biscuits, pies, etc. |
Here is a complete list of ways you can use a camping Dutch oven:
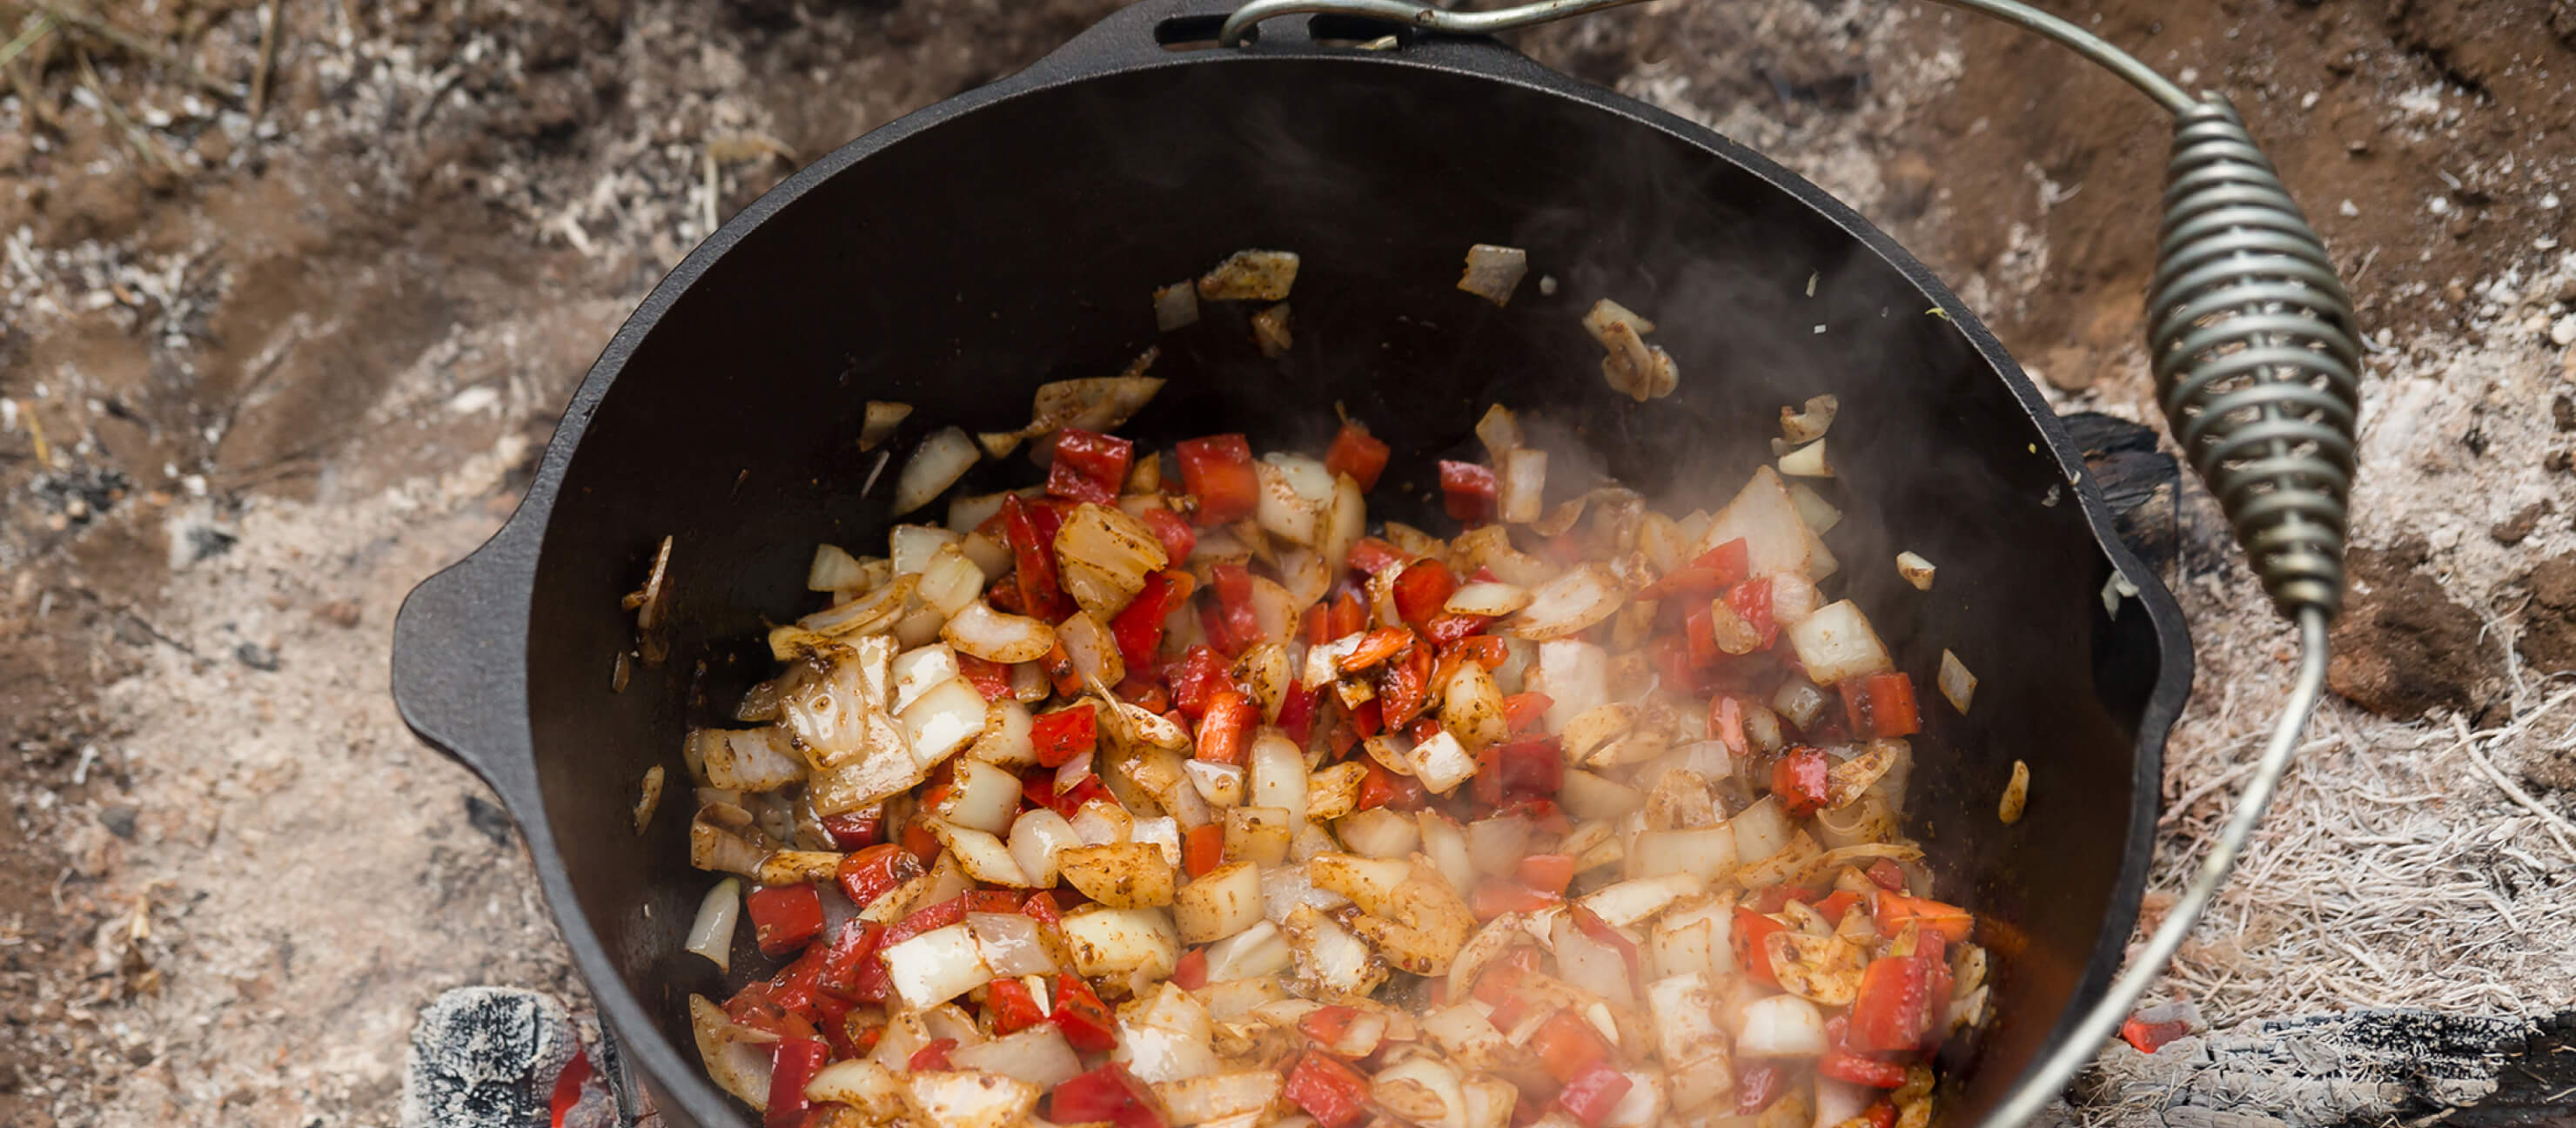
Saute & Pan Fry: Brown and cook foods like veggies, stir-fry, and more using oil or fat over high heat. This can help bring out flavors in the food while also preserving the nutrients. These methods are also done using single-direction heating and charcoal briquettes.
Braise: Use both wet and dry heat to cook large cuts of meat. First, brown the meat at a high temperature and then add liquid and cover to simmer for tender and delicious meat. Braising is one of the methods that require dual-direction heating to properly cook your meat. You can use charcoal or wood embers.
Baking: Use dry heat and your oven lid to prepare foods that you may not traditionally think of making in a Dutch oven, like bread and desserts. Baking necessitates dual-direction heating and can also use wood embers or charcoal.
Sear: A camping Dutch oven made of cast iron is great for getting crispy, browned edges of your steaks, chicken, and other meats. This method is easy to do with charcoal briquettes and single-direction heating.
Steam: A Dutch oven is essentially a large pot and lid, which works great to cook things like soups, chili, stew, and more. Steaming will require single-direction heating and charcoal briquettes.
Simmer & Boil: Add some liquid to your Dutch oven over moderate or high heat and then add your pasta, rice, or potatoes to soften and cook them. Simmering and boiling require charcoal briquettes and single-direction heating.
Step 2: Know What Temperature You Need
Camping Dutch ovens offer a unique advantage over other methods of cooking! When you cook with yours while you camp, you can use the following methods:
Set it over hot coals or wood embers in your campfire using a cooking grate
Hang it from a campfire tripod
Use dual-directional heating with a camping Dutch oven to bake or braise foods
Expert Tip:
Most other techniques only require a single source of heat from below.
What Is Dual-Direction Heating?
Dual-direction heating is when the heat comes from two directions — not just one source below. This works by placing hot coals or wood embers below and on top of the Dutch oven to allow for enough heat to get the desired results.You’ll use this type of heating when you bake or braise foods. Bring along enough supplies when you use these cooking methods.
Camping Dutch Oven Temperature Guide
If you’re a camping Dutch oven novice, you might find it difficult to know when you’ve achieved the desired temperature inside. For most recipes made in a camping Dutch oven, it should be 350°F.The following table will help you to know how many coals to use and how to place them. However, different recipes or cooking methods may require more or less. Use an instant-read probe thermometer to know the exact internal temperature.
| Camping Dutch Oven Temperature Chart | |||||
|---|---|---|---|---|---|
| Temp | Heating Method | 8-inch oven | 10-inch oven | 14-inch oven | 20-inch oven |
| 325°F | Single | 15 coals under | 19 coals under | 23 coals under | 30 coals under |
| 325°F | Dual | 10 lid, 5 under | 13 lid, 6 under | 16 lid, 7 under | 20 lid, 10 under |
| 350°F | Single | 16 coals under | 21 coals under | 25 coals under | 32 coals under |
| 350°F | Dual | 11 lid, 5 under | 14 lid, 7 under | 17 lid, 8 under | 21 lid, 11 under |
| 375°F | Single | 17 coals under | 23 coals under | 27 coals under | 34 coals under |
| 375°F | Dual | 11 lid, 6 under | 16 lid, 7 under | 18 lid, 9 under | 22 lid 12 under |
| 400°F | Single | 18 coals under | 25 coals under | 29 coals under | 36 coals under |
| 400°F | Dual | 12 lid, 6 under | 17 lid, 8 under | 19 lid, 10 under | 24 lid, 12 under |
| 425°F | Single | 19 coals under | 27 coals under | 31 coals under | 38 coals under |
| 425°F | Dual | 13 lid, 6 under | 18 lid, 9 under | 21 lid, 10 under | 25 lid, 13 under |
| 450°F | Single | 20 coals under | 29 coals under | 33 coals under | 40 coals under |
| 450°F | Dual | 14 lid, 6 under | 19 lid, 10 under | 22 lid, 11 under | 26 lid, 14 under |
How to Manage Heat
One of the biggest challenges of using a camping Dutch oven is knowing how to manage the heat during cooking so your food will come out perfectly cooked. There are no kitchen dials to adjust the temperature, so adding or removing charcoal is your best bet to manage it.There's an easy way to estimate the number of charcoal briquettes you should use to achieve the average temperature of 350°F in a 10- or 12-inch oven. Simply double the diameter of the oven and add 1 to get an estimated number of briquettes to use. Let’s say your Dutch oven has a 12-inch diameter, you should use 25 briquettes to reach 350°F.
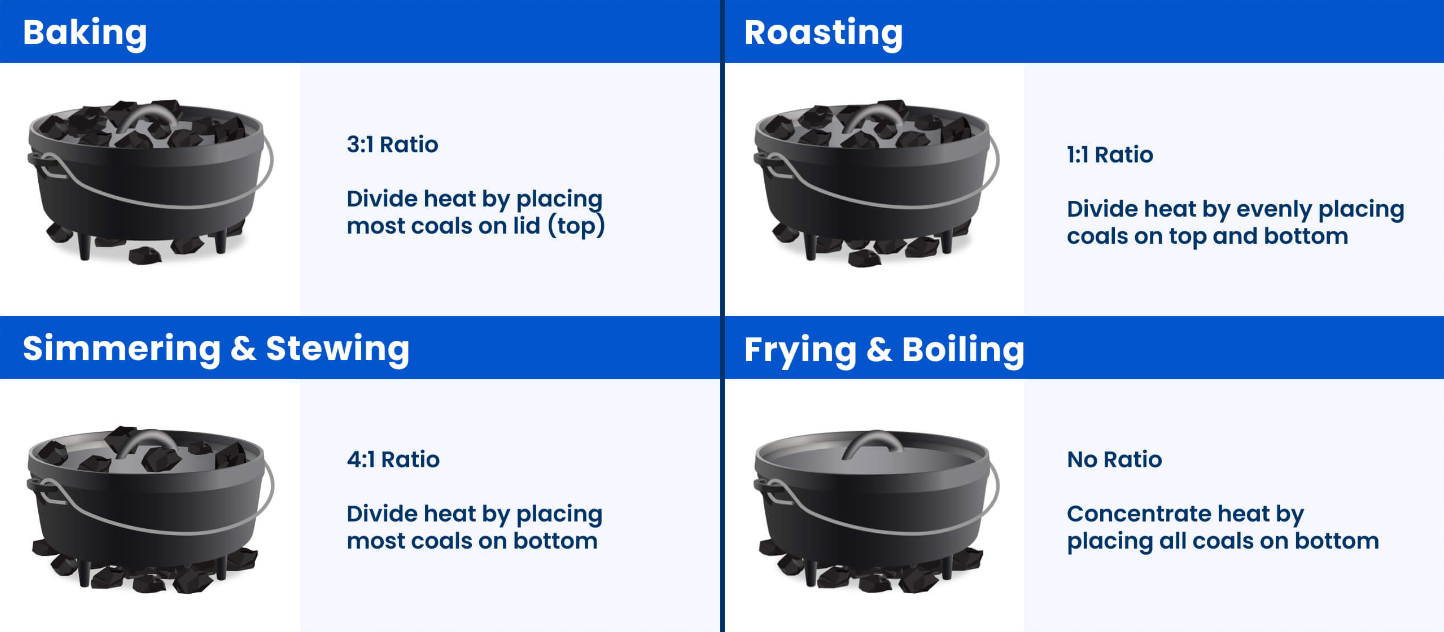
You will also need to break up the coals when using some cooking methods so that some are on top and underneath.
The best method for baking is to have a 3:1 ratio with most coals on top and less underneath.
For roasting, you’ll want a 1:1 ratio with even coals on the top and bottom.
When simmering or stewing, aim for a 4:1 ratio with most coals on the bottom.
When frying and boiling, put all the coals on the bottom to concentrate the heat.
Step 3: Light Your Campfire
The first step in cooking with a camping Dutch oven is to prepare and light your campfire. You’ll need to decide if you’re going to use charcoal briquettes or wood embers:
Charcoal briquettes have a uniform shape and are good for distributing heat evenly.
Wood embers from your campfire can also be used, but you’ll want to make sure you have hardwood like oak or maple so the embers will last longer.
Step 4: Prep Your Ingredients for the Recipe
You should prepare your ingredients before you start cooking with your camping Dutch oven so everything will be ready to go in when it’s time. Chop your veggies, trim your meat, season your steaks and grab anything else you’ll need before you heat your oven.
Expert Tip:
While you’re prepping, have someone else get the campfire roaring so you can get right to cooking.
Step 5: Cook Your Food
Heat your Dutch oven and cook your food. Reference the temperature and cooking method guides to ensure it’s at the right temperature for your chosen meal.Check your food occasionally to ensure it’s not burning or getting undercooked. For recipes that take longer than 30 minutes to cook, you will need to have additional charcoal on hand to put in the oven to maintain a consistent temperature.
Rotating the lid and body of the Dutch oven every 15 minutes or so is one technique to avoid hot spots and guarantee that your food is heated thoroughly. Simply use heat-resistant gloves to give the Dutch oven's body a quarter turn with the handle and rotate the lid a quarter turn in the other direction.
Step 6: Enjoy
The best part of campfire cooking with a Dutch oven is when you get to eat and enjoy your meal. Once you have gotten the hang of cooking in yours, you can experiment with fun recipes and different cooking methods.
Cast Iron Camping Dutch Oven Tips for Beginners
If you’re a newbie to cooking with one, here are some tips and tricks to make your experience easier:
Keep Your Cast Iron Dutch Oven Off the Ground
Most camping Dutch ovens are made of cast iron and if you put your oven directly on the cold or wet ground, it can take heat away from your food. You can use a barrier like a cookie sheet or griddle between the ground and your oven to prevent this.
Expert Tip:
When possible, always grab cast iron Dutch ovens with legs. It’ll be easier to place your coals underneath it while cooking!
Know When To Use Deep Vs. Shallow Dutch Ovens
The two main kinds of Dutch ovens are shallow and deep and they have different uses. Shallow Dutch ovens are used for baking, as the closer lid browns the food more easily. Deep Dutch ovens are used for other cooking methods like simmering and boiling and also for cooking larger quantities because of the increased volume.
Size Depends on Your Recipes
The size of the one you should use depends on what you’re cooking and how many people you have to serve:
The standard size for many recipes is a 12-inch diameter, which holds up to 6 quarts and 24 cups. This is a good size for a family.
A 16-inch diameter Dutch oven can hold up to 12 quarts and 48 cups and is suitable when cooking for a crowd.
Properly Care for Your Dutch Oven After Each Use
Cleaning a Dutch oven is the same as cleaning any other piece of cast iron cookware:
First, use a plastic scraper to scrape the inside of the Dutch oven, dislodging any burnt food particles or crumbs.
Once the interior is smooth, rinse with warm water and dry thoroughly.
It is recommended to apply a small amount of cooking oil to fully coat the interior and keep it well seasoned.
Expert Tip:
Keep your camping Dutch oven clean and well-maintained so it will always be ready to use.
What You Should NOT Cook in a Cast Iron Dutch Oven?
Although a cast iron Dutch oven is very versatile, there are a few things you should not cook in your camping Dutch oven. These include eggs, flakey fish, and acidic items like lemons, tomatoes, and citrus. These can cause problems with the cast iron seasoning and damage to your oven.
Next Steps
Now that you know the basics of camp cooking with a camping Dutch oven, bring one along on your next trip. Academy Sports + Outdoors offers a variety of camping cookware and Dutch ovens for you to choose from and also offers additional help on deciding with our How to Choose the Best Dutch Oven for Camping guide.